Cooking for One: Potatoes Two Ways

The mighty potato.

It is starchy.

It is filling.

It can be sweet.

It can be saucy.

But it is always delicious.

I've been working on ways to create multiple sauces or preparations starting from a basic ingredient. The idea is to create the basic ingredient once, in bulk and then add different sauces, etc. throughout the week so that you don't get bored with the same leftovers over and over.

This is part of my exploration into Cooking for One (see

here

for my first installation). Once I have enough of these recipes worked out, I'll post a succinct compendium (that there is a $20 word), but for now, I'll link them all through the individual posts. Of course, they'll all be tagged Cooking for One, so if one needs to find them quickly, this key phrase can be put in my handy search box on the right hand side of this site.

But I digress.

Potatoes seem like a great base for many things. I've got two variations here: a light potato salad (light because there's not too much mayonnaise involved) and a pan fried potato with bacon. Both are great, and are based on a large pot of boiled potatoes. Stored in an airtight container, once they've been fully drained and cooled, the potatoes I made kept for a week.

All you need to do is boil up the potatoes and then create sauce variations when you are ready to serve them. Easy as pie.

Boiled Potatoes

serves plenty, portion out to one-person servings as you see fit

Ingredients:

  • 1 to 2 lbs Yellow New Potatoes
  • Salt to taste

Method:

  • Fill a large non-reactive pan (I had to use it sometime...) with water, leaving enough room for the potatoes to fit comfortably, while being covered by the water.
  • Chop each potato into 6 to 8 even pieces.
  • Boil potatoes for about 15 to 20 minutes, or until you can put a fork through them, and the skin has turned translucent.
  • Drain potatoes, let cool and portion
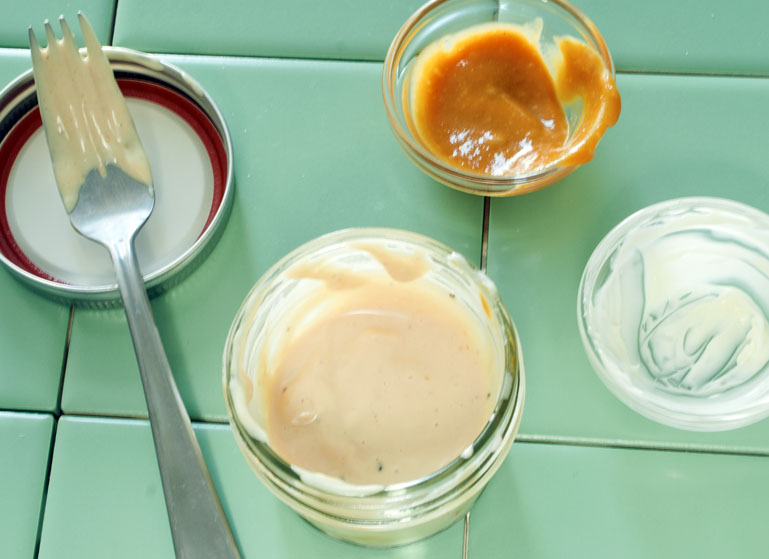
Potato Salad

Ingredients:

  • 1 portion Boiled Potatoes (see above for recipe)
  • 1/4 cup Red Wine Vinegar
  • 1/4 cup Mayonnaise
  • 2 Tbsps Mustard (I used Sweet/Hot)
  • 1 Spring fresh Tarragon (you can use 1/4 tsp dried instead)
  • Salt and Black Pepper to taste

Method:

  • Mix the vinegar, mayonnaise and mustard together. It should be thin enough to pour once it's all mixed up.
  • In a small bowl, pour the dressing over the potatoes.
  • Using a fork, coat the potatoes with the dressing, pressing down with the fork to roughly break up the potatoes.
  • Finish with a sprinkling of tarragon, salt and black pepper.

Bacon Fried Potatoes

Ingredients:

  • 3/4 pound bacon, cooked and broken up into small pieces
  • 1 portion Boiled Potatoes (see above)
  • Olive Oil for cooking

Method:

  • Turn the oven on to broil.
  • Heat a large non-reactive pan over high heat.
  • When it's hot, coat the bottom of the pan with olive oil. If you have bacon grease on hand, you can use a little of that here, too.
  • Add bacon pieces, cooking for 3 minutes.
  • Put potatoes in with the bacon, stirring to coat them with oil.
  • Cook for 10 minutes.
  • Move the pan to the broiler.
  • Cook for 5 minutes, then stir the potatoes, getting all the crunchy bits from the bottom of the pant scraped up.
  • Put the pan back in the broiler for another 5 minutes.
  • Remove and serve!

Quagliariello

I got a bunch of really nice gifts for my birthday, many of which had to do with cooking.

Two are featured here: a lovely stuffed quail and a beautiful Le Creuset skillet.

The quail is incredibly fitting, as you are about to learn. The friend who gave me the tiny bird to roast knew some of my family history, and that my daughter's middle name is Quaglia (a shortened version of Quagliariello). She also gave me a gift certificate for a lovely speciality butcher shop here in SF, Olivier's, which I cannot wait to cash in.

I asked Joe (my Dad) to recount the story one more time of the history of his family's name. Here is his story, which I felt I couldn't do a better job of paraphrasing so included the whole epic story.

Well, it all started during the Holy Roman Empire. My ancestors were poor peasants who tilled the land not two miles from Caesar's Palace. (Not that one.)

A couple of thousand years later, my paternal grandfather decided to tear himself away from the rocky, dry land he was tilling, and he arrived in Brooklyn around 1900. He got a job working in a shoe factory, which turned out to be demanding and ill-paying, but still better than the land-tilling ever would, so he decided to stay.

His name was Thomas Quagliariello, the last name being Italian for "little quail." Starting with the day he spent at Ellis Island, he was aware that his last name didn't sound American. So he decided to follow the course taken by his cousin, a locally well-known boxer.

This cousin had a cigar-smoking manager who ruled that, for poster purposes, the boxer need a name shorter than Quagliariello. The manager smoked only light cigars, which were identified on the side of their box by the Spanish word "claro," which, in different contexts can mean, "mild" (for cigars), "clear" (for weather), or "I understand" (as in "It's clear").

So Pasquale Quagliariello became boxer Patsy Claro, and my grandfather, believing this was an American name (even though it sounded Italian), followed suit. Years later, my father and two of his half-brothers did the same, while the other brothers either retained their original name or shortened it to Quaglia. 

And that's the story.

So as you can see, my friend hit the nail on the head with her gift, which was delicious as well.

Stuffed Roasted Quail

each bird serves 1 person

  • Order pre-stuffed birds from your local butcher, if you can get them.

You can stuff your own bird, but I believe it would be very hard, based on the tiny nature of these birds and the tiny bones you'd have to remove. If you are going to stuff it yourself get some nice sausage, roasted chestnuts and some raisins or sultanas. I can't really advise you how to stuff the actual bird, but check

this link

out, it may be helpful.

Method:

  • Preheat oven to 450 degrees
  • Put a small amount of olive oil in a heavy bottomed pan. Make sure the pan is big enough to allow space between multiple birds.
  • Lightly salt the bird and put it in the pan.
  • Roast the bird(s) for 10 minutes.
  • Remove from the oven and let sit for 5 minutes.
  • Drain the fat from the pan and serve up the bird(s).

It's Not Burger King...Best Chicken Sandwich Ever

I love the Burger King Classic Chicken Sandwich.

Let me rephrase that. I love the memory of eating the Burger King Classic Chicken Sandwich. That first bite, the warm breading, the mixture of grease and mayonnaise. I rarely allow myself to buy one anymore, but the memory lingers on.

Yesterday, while I was doing birthday returns, there appeared on the horizon the mighty Burger King. I was almost weak enough to give in and get in that drive-thru lane and get me one of those sandwiches.

Then it dawned on me, wait a minute, I can make my own version, my way, in no time at all. Which is exactly what I did.

I knew I could make a good gluten-free breaded chicken, mayonnaise is always in my fridge but I had to think about the elements (other than actually deep frying) that make that sandwich taste so good. Then it hit me: lettuce. I know it seems simple, but I never put lettuce in a sandwich, unless it's a BLT.

The marinade that I made is a one that I make regularly. I replaced the milk with almond milk and added some honey, barbecue sauce, egg and hot-sweet mustard. The bread I used is a great gluten-free variety toasted and spread with mayonnaise.

Well, let me tell you, it worked! What a great treat, easy, not too bad for you, and delicious.

Gluten Free and Dairy Free Breaded Chicken Sandwich (or the Faux Burger King Classic Chicken Sandwich)

serves 4

Ingredients:

  • 4 Chicken Breasts, boneless/skinless, cut thin
  •  1 egg
  • 3 ounces Almond Milk (or any kind of milk you have on hand)
  • 1/4 cup Barbecue Sauce
  • 2 tsps Mustard (I used sweet-hot, but you can use any variety)
  • 1 Tbsp Honey
  • 1/2 cup gluten-free Bread Crumbs (I use this brand.)
  • 2 slices Udi's Gluten Free Bread

Method:

  • Preheat the oven to 425 degrees.
  • Mix all the wet ingredients in a bowl large enough to accommodate all the chicken, too.
  • Add the chicken. Let it soak for at least ten minutes. If you've thought ahead and got to this point the night before, go ahead and soak the chicken overnight.
  • Turn the heat to high on a large skillet.
  • Put the bread crumbs on a shallow plate.
  • Place the chicken in  the breadcrumbs and turn it over to coat both sides.Repeat until all chicken breasts are coated.
  • Add oil to the hot pan.
  • Place each piece of chicken in the pan, making sure there is some space between each piece.
  • Cook on the first side for 5 minutes.
  • Turn over the chicken and cook for 2 more minutes.
  • Put the pan in the oven to finish cooking for about 10 minutes.
  • While the meat is cooking, shred the lettuce and toast your bread.
  • Remove from the oven and make your sandwich.

Enjoy!