How to Make the Chutney

On a warm San Francisco Sunday we decided it was necessary to get some of our nice late Summer fruits canned up for the coming Fall. The chutney I ended up with is sweet and tangy, with a nice hint of sage, which is perfect with roast, especially pork.

It's a very simple recipe, and the way I did it, required little more than measuring (sort of), chopping and boiling down the fruits.

Herewith, the recipe.

Hope you enjoy it.

Orange, Fig and Sage Chutney

3 to 4 pounds Oranges, sliced into 8 pieces each

1 lb granulated Sugar

1 basket Figs (about 14 figs), sliced in half

3 sprigs Sage, minced1/4 cup Lemon juiceRind of 1/2 Orange

2 cups water, or enough to cover

Make the Chutney:

Put all the ingredients into a large, heavy bottomed pan, making sure there is enough water to cover the fruit.

Set over a medium heat and bring to a boil.

Once the mixture boils, lower the heat to a simmer and stir regularly to keep it from sticking to the pan.

While you are stirring, press down on the orange pieces to release the juice.

As soon as you are satisfied with the texture of yo

ur chutney (meaning it will be chunky, good for spreading on meats!), turn off the heat making sure that your jars/lids are ready to be filled.

Boil your jars and lids while the fruit is bubbling away in the other pan

 .

Take a large wide pan, fill with water, enough to submerge the jars and lids, and place on the heat to boil.

Once the water has boiled, lower to a simmer and keep the jars in the water for five minutes.

When the chutney is ready, remove each jar and lid one by one onto a

clean cloth, right side up, to keep them as sterile as possible.

Fill your jars and  seal them:

Ladle chutney into each jar, filling up to the bottom of the neck of the jar, leaving headspace for the sealing to go well.

Wipe down the top of the jar to make sure nothing is sticky on the outside, so that you can seal the jars, and they can be opened again.

Put the lid on and close it as tightly as you can.

Turn the jars upside down and leave to cool. This will seal the jars.

some people re-boil the filled jars, but I opt not to. if you want to, this is the time to do it!

Scones on a Sunday

I maybe gluten-free, but my daughter, Ms Iz, certainly is not. She is very good about eating my versions of baked goods and pastas. But, every now and then, she wants the real deal.

Her request this weekend was for some "gluten-full" scones, please. I happily made them for her.

I've used the NY Times recipe for Tea Scones for years. I wonder, too, if this is Gran Fran's scone recipe of choice. It's a nice recipe, very simple and when you take your time with it, the results are great. Very fluffy and satisfying.

Ms Iz loves lemon curd on her scones, and not too much butter. As you can see below, I made half a batch with chocolate chips. These were well received, but the orignal ones went over big.

So, get your paper, a cup of tea and some berries and settle in with these wonderful scones.

Click on this link to the NY Times online to get the recipe.

Enjoy!

The Jam Continues On

My friend and I did some more canning this past weekend. Ms. S is a lovely lady from Minnesota with a grandma in Iowa who taught her about all things preserved. I am not much of a measurer (ala Gran Fran), Ms. S measures everything to a T.

Needless to say, our jam session was interesting, what with me just chucking all sorts of stuff in my pot, and her making sure to follow her grandma's instructions to the letter. Of course, Ms. S ended up with a lovely and perfect batch of strawberry jam, which was perfectly set and tasted great.

I ended up with more of a chunky sauce, best to accompany meats. It's not that mine tastes bad, on the contrary, it tastes great. But, it's really hard to classify it. The ingredients are simple enough: oranges, figs, sugar, water, pectin, sage and cinnamon. The end result is really flavorful, just not necessarily for spreading on one's toast.

Mostly, I'm here to boast about how I used my first jar. By spreading it over a pork loin, that was placed atop carrots and new potatoes for roasting.  The jam melted into a wonderful sauce. It coated all the veggies and gave the pork a really nice sheen, not to mention the contrast of the sweet orange flavor with the meat.

The greatest part about working with Ms. S, was how we each approached our projects with such different attitudes. We acknowledged that though each of us had her own way, we could totally see the benefit to each of our methods. It's nice to find someone who is different from you, but who gets you so completely.

The recipe that follows is just for the pork loin. I want to refine the chutney recipe a bit more before I post it officially, so, for now, I will recommend that you use a nice orange marmalade instead.

Pork Loin, Carrots and Potatoes with Orange Jam


Ingredients

  • 2 pounds Pork Loin
  • 8-10 New or Fingerling Potatoes cut into quarters
  • 2 large Carrots, cut into 1/4 inch chunks
  • 3 sprigs fresh Sage, chopped coarsley
  • 1/4 cup Orange Marmalade
  • Oil for searing the meat
  • Salt and Pepper to Taste
Method
  • Preheat the oven to 400 degrees F.
  • Place a heavy-bottomed non-reactive oven proof pan on the stove over medium-high heat. When it is heated well, add olive oil to coat the bottom.
  • Put the pork loin in the hot pan and sear on both sides, about 4 to 5 minutes per side.
  • Once the meat is seared, pick it up with tongs and put the potatoes and carrots beneath in the pan, then put the pork on top of the veggies.
  • Spread the marmalade, jam or whatever saucy goodness you are using over the meat, making sure to coat it thoroughly. It's also nice to get some of it on the veggies, so they get a little crispy and sweet while they cook.
  • Sprinkle sage over the pork and add some salt and pepper.
  • Place the pan in the pre-heated oven and cook for approximately 25 minutes.

In A Jam

It has been a long time coming.

I've finally found the nerve and patience to make some jam. Actually, these may be preserves, I'm really not sure of the distinction. All I know, is that this, my second time around with making jam, was way easier than I could have imagined.
I do want to give you a bit of information about me and jam, jelly or any fruit-item not served in its original format. It was only within the last six or seven years that I became a fan of fruit mixed into anything, let alone cooked down and spread on stuff. I can't pinpoint the exact dish, but I'm pretty positive it had to do with some kind of pork loin, and then soon after that a tart of some sort. I still don't love fruit mixed into things like yogurt, baked goods or cereal, but I have come a long way.
The jam session (yes, I meant it to sound like that) didn't even begin until after 10pm on a Monday night. My man and I were out to dinner and discussing what to do next. Having just consumed a good amount of Indian food, dessert was out of the question. It being a weeknight, drinks, too, were off the list.
I asked Mr. CM if he'd be interested in making jam. He very enthusiastically said yes. We headed to the market for one more pound of apricots, lemons and more sugar. As we walked home we were both a bit worried about what we were signing up for.
I had asked two friends who make jam regularly for advice before buying the fruit. One recommended using pectin or gelatin, the other didn't. The non-pectin friend also suggested that the fruit reach a temperature of 246 degrees before removing it from the stove.
Armed with the advice of my friends, four pounds of apricots and lots of lovely canning jars, we embarked on our jam making. I am the proud owner of many Le Creuset pots and pans, so I chose to use the largest one I had on hand (last time I used a huge non-stick stockpot). Let me tell you, it cooked beautifully. All I can say, and remember, I'm a novice jammer, is use as heavy-bottomed a pot as you have.
Initially, we just cut the apricots in half, added the sugar, lemon juice and orange flower water and put it on the stove to boil. As soon as it started to thicken, Mr. CM noted that the fruit wasn't breaking down very quickly and proceeded to grab the kitchen shears and cut the cooking apricots into way smaller pieces.
It was at this point that I discovered the fresh vanilla bean in the cupboard. I love the musky flavor of vanilla and thought it would be a good counterpoint to the sugar and the tangy apricots. Turned out to be right on the money.
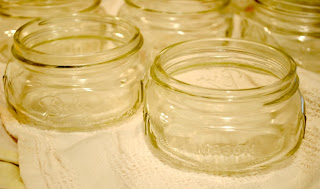
While the fruit boiled away, I put the huge stockpot on the other burner and filled it with water. Once it began to boil, I added all the jars, lids and rings and boiled all of it for five minutes. Last year, I had purchased some special tongs to remove the sterilized jars from the boiling water, which was very helpful this time out, too. 
As soon as the jam reached the consistency I was looking for, we scooped it into the jars, added a small piece of vanilla bean to each jar, and sealed them most of the way closed. We didn't have quite enough jars (I only  bought 8), so the remainder went into a bowl with an airtight lid, which Mr. CM took home to his little boys to enjoy.
I cant decide what flavor to make next, but I'm thinking something with rosemary added to it. I mean, if you're going to make your own jam, why not make it interesting?
Apricot Jam with Orange Flower Water and Vanilla Bean

special equipment: canning jars
Ingredients:
  • 4 pounds very ripe Apricots, pitted and chopped into eighths
  • 3 cups of Sugar
  • 1/4 cup Lemon Juice
  • 4 tbsps Orange Flower Water
  • 1 Vanilla bean split open (or 1 tsp Vanilla Extract)


Method
  • Place chopped apricots, sugar, lemon juice and orange flower water into a large, heavy-bottomed pan. I used a Le Creuset here, which yielded great results.
  • Put pot over medium heat, stirring occasionally, until mixture begins to bubble and sugar crystals are pretty much disolved.
  • Lower heat to a simmer, and continue to stir regularly for the next 40 minutes, or so.
  • About ten minutes after lowering the flame, add the split vanilla bean to the pot.
  • Meanwhile, boil a large pot of water, place all of the jars and lids into it and boil them for five minutes.
  • Remove the jars from the water onto a clean surface.
  • Once the jam has reached the consistency that you prefer, remove it from the heat and ladle into sterilized jars.
  • Fill jars 3/4 of the way full, put the lids on, leaving a little give, to let the mixture cool. When it's cool, you can turn the lids to completely closed, to insure that the jam will keep well.

Note: I did not do another boiling water bath at the end. The jam will keep, unopened for three months without sealing the jars one last time in boiling water.